Rigging Movement
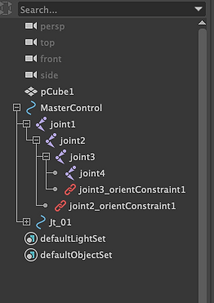


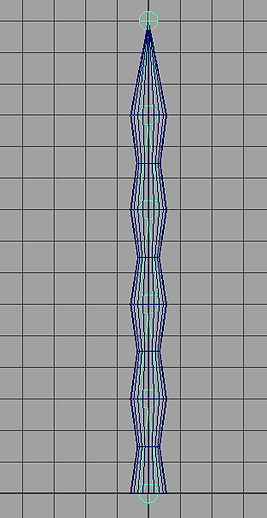

For this part of the take i started off by creating a cube and scaling it, then i created a joint from the skeleton menu and snapped it on the grid inside the shape from bottom to the top. then i added a curve circle and duplicated it 4 times and lined them up with the joints that was connected to the shape.

Afterwards from here i renamed each curve to joint controls and master control.

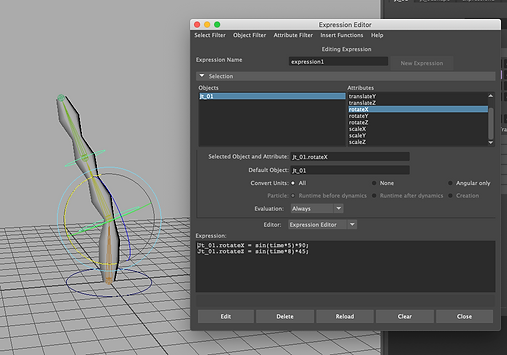
Then at this point i then went to the expression editor and connected the objects to the attributes. Then from the expression box i need to add a code to rotate the shape with the joints and the curve. Which gave a purple colour in the transform attributes which means the joints are working.


MASH Movement
Part 1
From here i just added the shape that i was using previous and used a Mash which duplicated the same shape multiple times then i added a sphere and played around with menus in the MASH menu and added animated shapes.
Part 2
Rigging Controls Robot


From here i opened maya and created to shapes, the cube and the sphere after that i clicked on animation and clicked on the menu key and selected set driven key - set and selected the load driver and load driven for both shapes.
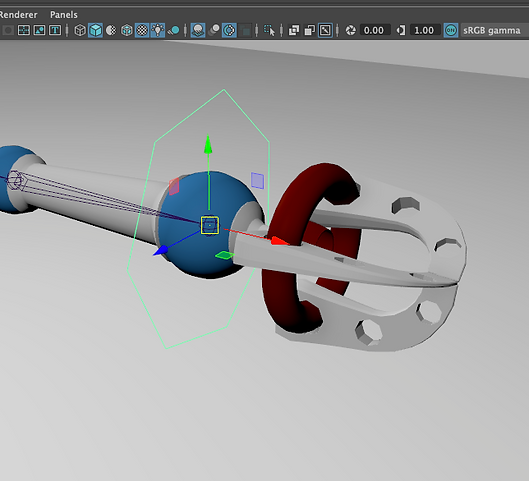


After that i opened a preset character model then i selected the joint curve and duplicated it and renamed it and selected it again to connect in to the characters arm then from the joint and shirt selected it with the arm and clicked p for parent and then i created a attributes and renamed (CLAW CONTROL) it and selected the ones that needed to be selected then i clicked ok. After that i clicked on the key menu and selected set driven - set then i selected the control joint and clicked on the load driven the i selected all the claws and clicked on load driven then i selected the claw control in the set driven key option and also selected rotate X - Y - Z and key framed it in the key button and the in the time liner i moved it in from 1to 10 and opened the claw and from the frame 10 i set key to make the claws animated


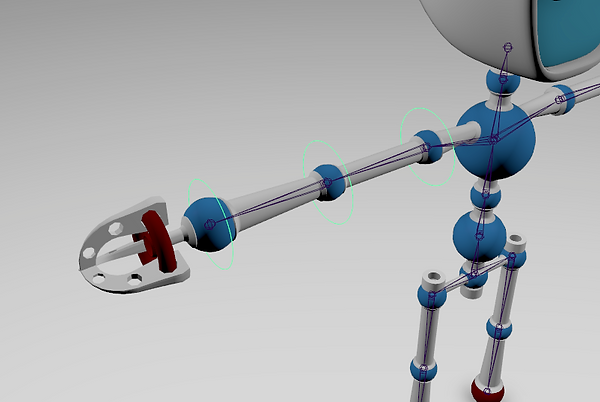
Duplicated the curve and selected it then i aim at the shoulder and hold V and click middle mouse button to snap on the middle of the shoulder. Then i selected the shoulder curve with the arm joint and click constrain/orient and duplicated it and click modify/ match transformation/match translation. Then i freeze transformation and select the curve circle and selected it with the joint arm and click constrain/orient.


From here i clicked on create IK Handle and clicked on the shoulder and the wrist not the wrist circle which constrained the arm to move. Then i duplicated the the diamond and selected it and connected it with the elbow and click modify/match transformation/match translation. then i clicked on constrain/pole vector. then i selected the left hand control from the outliner and selected the IK handle with it and clicked on constrain/point.

From here i clicked on:
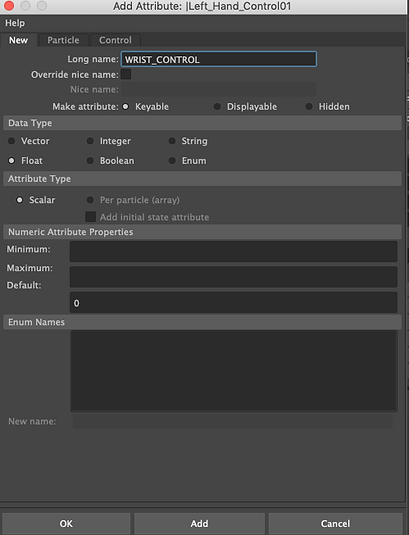
Curve circle and go on Attribute Menu and go on the Transform Attributes and then clicked on the Attribute menu list and clicked add Attribute twice then named it:
-
FOR BACK CURL
-
L R CURL
The Next i clicked on Modelling to Animation from the menu list. Then from the bar menu i clicked on
Key > Set Driven Key > Set (With the box). Which then opened a menu box.
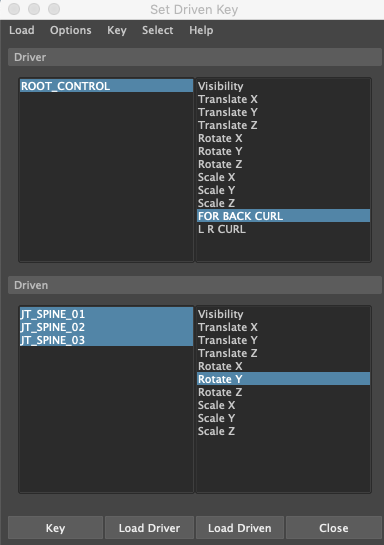
Then i selected the curve circle (ROOT CONTROL) and clicked Load Driver
Then i selected the Spine joints and clicked Load Driven
Connecting the curve to the spine joints:
Selected ROOT_CONTROL > FOR BACK CURL
Selected all the Spine joints (JT_SPINE_01 > 03) and selected the Rotate Y
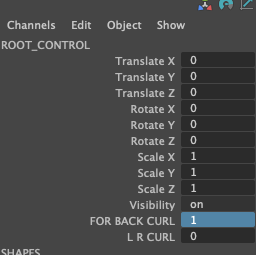
Then in the channels Box select FOR BACK CURL = 4
After that i selected the curve circle and clicked Load Driver
Then i selected the Spine joints and clicked Load Driven
and i selected the curve circle and clicked on load driver then i selected the spin controls and clicked on load driver. then i went on attributes and clicked add attributes then i added two controls 1st: For BACK CURl 2nd L R CURL then i selected ROOT CONTROL
Assignment 1
Reference Image


Progression Video (Modelling The Character)
Part 1
Part 2
Part 3
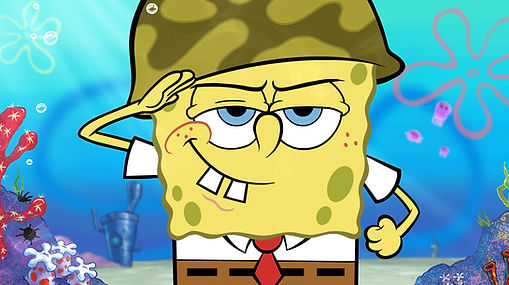
For the Assignment i decided to model Spongebob Square Pants. Which i used a reference image that helped me to model the character. As you can see above i decided to record my progression of me modelling the character from 3 parts.
Rigging the Character (Arm)

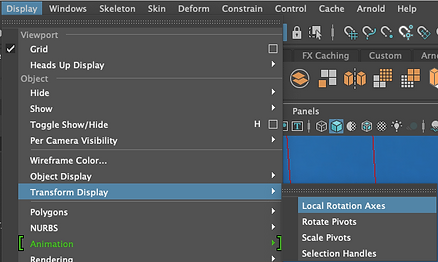

From here i didn't record myself added the rigs however i will explain what i did. From the rig menu i clicked on skeleton and selected create joints which on the grind i created 4 joints and deleted 1 for the hand. Which then i rotated the joint to match the arm of the character. Then i selected one of the shapes of the arm (shoulder) and clicked on display > transform Display > local Rotation Axes which gave me 3 axes on the shape (X/Y/Z) then i moved the joint to the axes of the shape. Afterwards i repeated the same method to the elbow, wrist and the legs. Then i used the mirror to create a duplicate for the same joints to the other side of the body.

At this part i added the joint for the spine and then i connected each joint together by parenting them. Then i parent the shapes of all the body to the joints.
Parent Joints (Progression)
This is my progression of joining the joints and the shapes of the body together
Final Result


Rendered Image

Presenting the Movements of The Rigs
Assignment 2
Reference Images


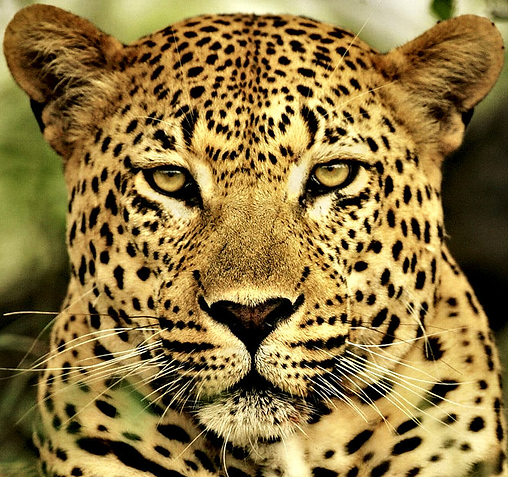
For this project i decided to do something different, instead of me continuing from my previous work i decided to model and create an animal (The Jaguar)
Beginning Of Progression


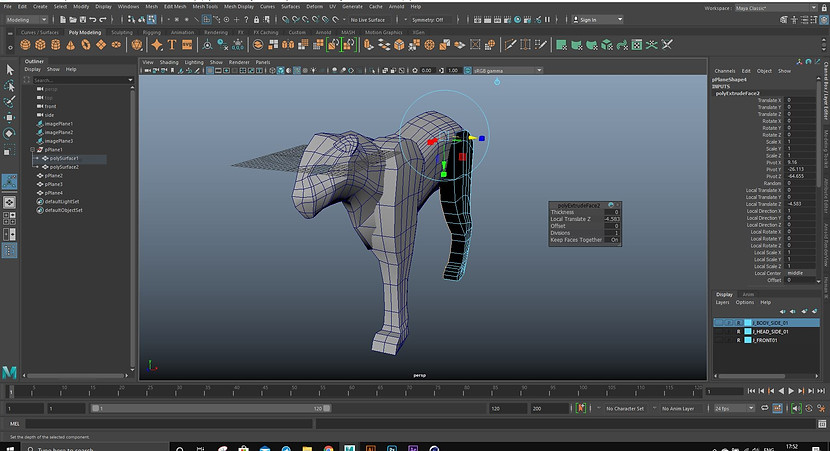


From here i used Maya and imported the references images of the jaguar and then started modelling the animal from front to back, legs and the tail. Then i smoothed the model.
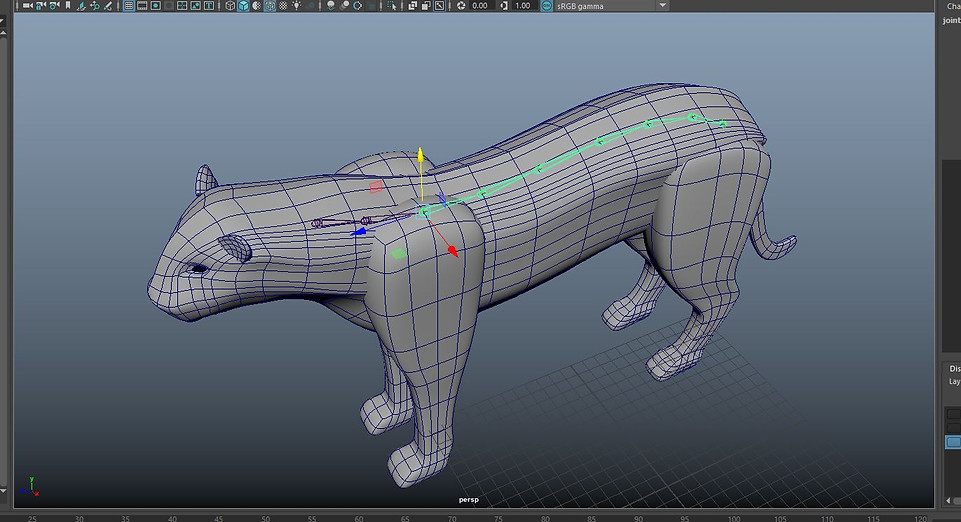
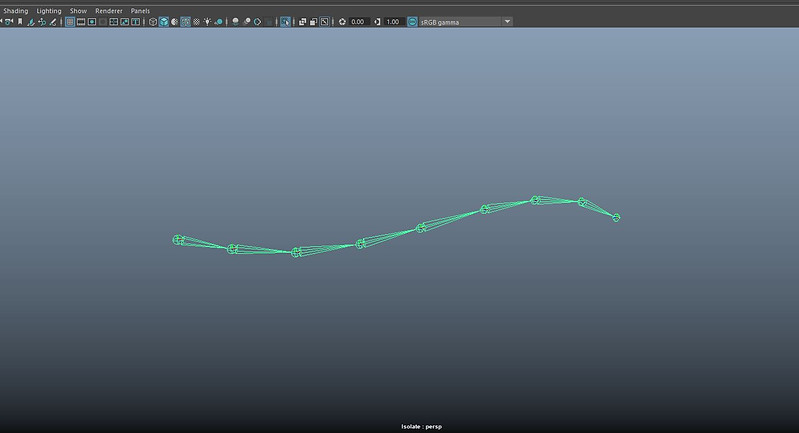

From here i finished the model then i went on rigging menu and clicked on create joints. Which then i created 9 joints for the spine. Afterwards i connected the joints to the animal by using the bind skin and then i added clusters to each joint.
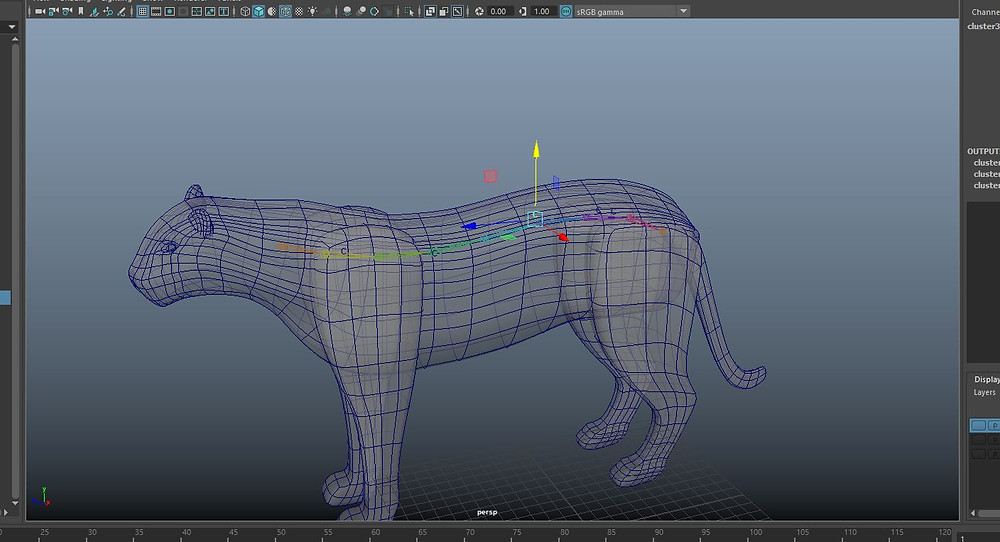


After the clusters i then create NURBS Circle and duplicated them 5 times to create spine controls and placed them to each cluster point with modify/match transformation/match translation.and then i placed them in groups.
