Unity Development - Assignment 1
Part1: The Start

1.

2.
From the start of this project we (as a class) started using unity, which of course i never used it. However, i started to use it for the first it felt of most like i'm using Maya. In Unity i learnt how to create a project and save scene, afterwards i started to create a 3D object which is the plane i then scaled the plane, made it large enough to make a ground and to fit my objects.
In Unity i created a cube and scaled it to make it wider then i duplicated the same shape twice which made it look like a blocks of stairs, then i duplicated the 3rd shape and made it as a wall which is placed on the right side.
After that the next task, i created a sphere and duplicated it to make a pattern from a big sphere to a small sphere with the scale tool and then spread the shapes in a abstract line around the scene.


Part 2: 3D Model (House)


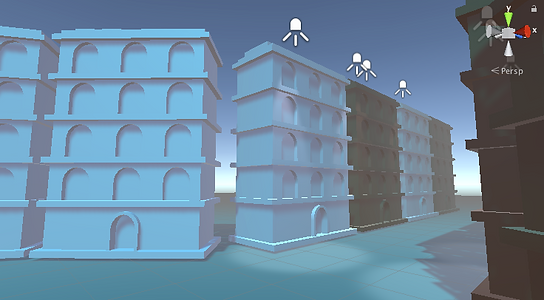
From this particular task i dragged a FBX model (Cartoon Building) from the file to unity and placed it in the assets section and then i dragged it into the scene, after that i created a 3D plane which was the ground for the building. Then i used the scale tool to change the size of the object and then i rotated the object and duplicated it more then 3 times around the scene to create a small town.


From this part i duplicated more buildings. Then i clicked on assets and created a material named it to the colour that i will be using for the buildings which were brown and light yellow.
Light Experiment
Light

Dark

Soft Light


From this part i was experimenting light methods by making the directional light lighter or darker or just a soft light which drops a bit of the light and then changed the colour of the light to a warm blue cyan colour
Fog Effects and Spot Light

Spot Light (Setting)

Fog (Setting)

Experimenting with lights an Fog.
I started by continuing from the previous scene of the buildings. Then i created a spotlight and duplicated it more then once and placed them between the buildings from the edges (left and right), then i scaled the spotlight range and changed the colour, afterwards i went on windows and clicked on rendering settings and added a fog which i increased the density to 0.08.
Part 3: Terrain


Experimenting with Terrain.
I started creating a terrain and scaled each side to match the same size.
Afterwards i used the raise/low terrain brush to paint around the ground.

Experimenting with Terrain.
After that from the previous scene, i Continued with the brush and then added a paint texture to paint around the scene and then i added some grass.
Prefabs, Snapping, Materials
Cube


For this part i created a 3D Cube scaled it. Created a new material and placed the UV Map texture into albedo from the material and dragged the material onto the cube and duplicated it 3 times and positioned it in a line and duplicated it again to build a cube.


Afterwards i duplicated the cubes and placed them around to create a pattern and changed the sky dome background colour to brown.
Materials


Nothing much from here but i started by dragging a 3d model of a rabbit and creating a material for the rabbit and changing the rendering mode to transparent and changing the metallic and smoothness. For the cubes i did the same steps however i added textures to the cubes and changed the colours.
Particles


For this part i went on gameobject/effects/particle system. In inspector mode i used the emission and shape to change the speed and the colours for the particles and then i created a material and dragged in a cloud png into albedo and switched the material shader from standard to particle/standard unlit. For the fire added another particle system and used the renderer option and dragged the material in and then i went on force over lifetime and switched the (space) option of 'world' to 'random between two constants' which helped me to create fire then i add gradients
Underwater Test


Matt Sorting


For this task, this was mainly for matt painting which i had to place 2D assets in and re arrange them around the scene (For the game title). For the Bee was something different which i had to place png assets in the scene and placed them around and added a script to make the bee move

This was the script to make the bee move
Camera and Chroma Keying


Basic node manipulation and Mixing colours

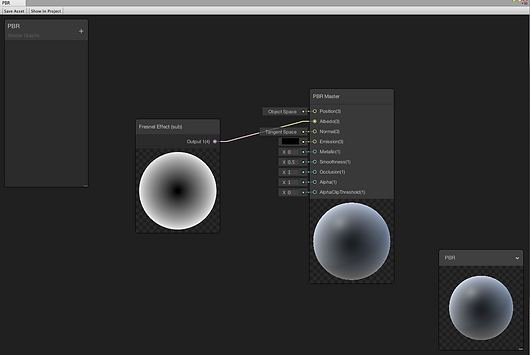
For this part i imported a rabbit asset to unity into my scene and started off creating a new material and a PDR, which i had to connect the material with shader graphs to the PDR. Afterwards i open the PDR file and made different nodes and connected it to the PDR Master.


For the pink rabbit i did the same principles from the first one but added more nodes and connected it to the PDR Master and then i made a property which saves the master node into the inspector menu bar (from PBR03).


I did the same method on this bunny and changed the colour however this node was different which i had to use a unit, which i created a new material and PDR but made the PDR as a Unit Graph.


Graphical Optimisation

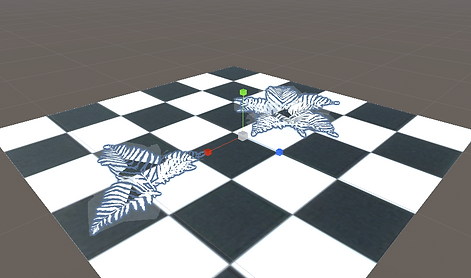

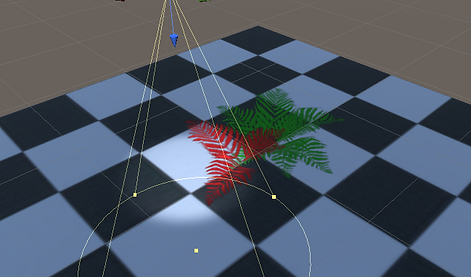


For this part i started of with 1 asset (leaf) and 2 png images and placed them in the scene and added a plane for the ground and assigned it with the checkers material and changed the colours for each leaf. Added a spot light and changed the colours and the direction light.
Basic Programming


Basic Programming was a different task which i had to only code the cube, as you can see i first created a 3D cube and made the scene 2D, afterwards i created a script and added theses codes (myNumber/counter/Timestwo) and saved it to respond to the console.
Basic Programming
(Top Down)


For the Top Down Basic Programming i started off by importing presets png assets, which i first dragged the 2D wall and duplicated it around to make a square and added a door, afterwards i added a component the box collider and reason i put a box collider for the wall so that the player doesn't drop or try to go through the wall, did the same with the door.


For this part i continued from the first step then i added a player but in order to make the player move i needed to create a script for it, which on the right side i placed the codes in to make the character move.


Afterwards from making the script for the character i then place a png key and crates which for the crates i added a box collider component and for the key i added a circle collider and rigidbody 2D however the when i clicked play the key would fall so i decided to add a box collider
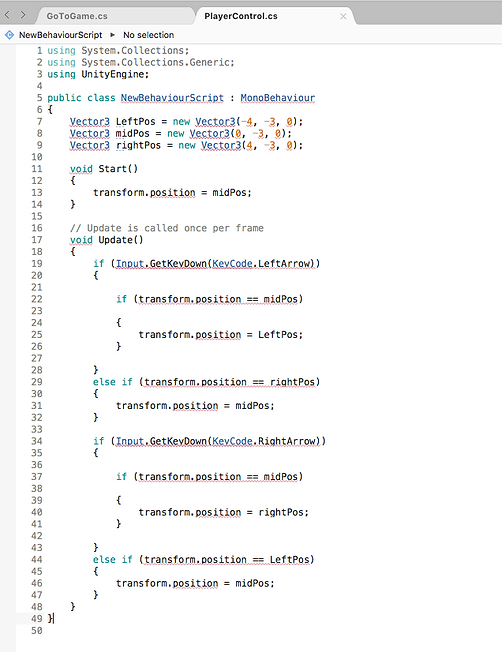
Programming
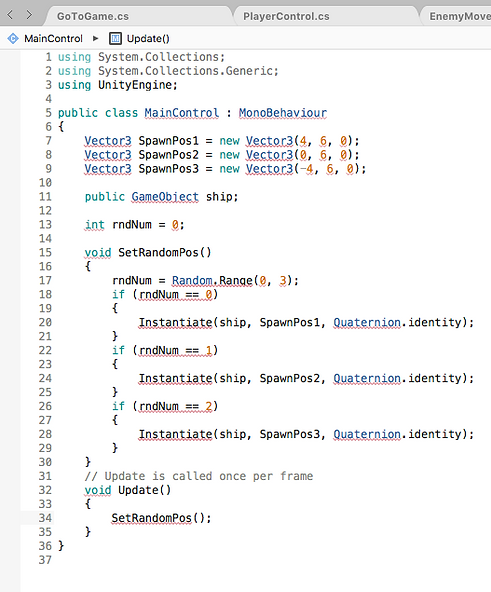
Lane Game


For this particular programming part , i decided to show more of the scripts that i coded for the game and making them move in unity. The Beginning: i started off importing png assets to unity. Afterwards i dragged tiles for the menu in the scene and other assets (ships, Lanes) into the scene and added a box collider for the start menu. After that i created a new scene and called it "Game" for the start 'for when the game begins' and a script.


After that in order for me to play and click on the start menu, i went on build settings and added both scenes for 'Menu' and 'Game' which then allowed the start menu to function and go direct to the game while its playing.
Programming Lane Game (PlayerControl Script)

Programming Lane Game (EnemyMovement Script)


Programming Lane Game (EnemyMovement Script)